Sunday, 27 April 2025

Terrain for pulp vs Alley’s The Hollow Scenario - Part 3, The End

 This is the Final part of  my wittering on about putting together a board for The Hollow Scenario.

The last three plot points were quite easy to sort out:

For Grandmother Brunt I’m using the Witch miniature from Gripping Beast, I've already got her painted, also there's a log Cabin that I've already painted up as her house.

Egon Van Ripper plot point will be a Silver Bayonet Canada Harvestman Agent (another previously painted miniature) from the official Northstar Miniatures range. 

I really like this miniature & I’ve not had chance to use him in a game yet.

For the Gravestone, I used a Citadel one from the old Plastic Skeleton sprues & put some tufts around it, to make it resemble being hidden. 

And of course, there’s the Big Bad, the Headless Horseman. I am going to use the converted Front Rank Archduke Charles figure that I converted for The Silver Bayonet scenario The Headless Rider.

I’m also using some other bits & pieces of scenery, some of it scratch built & some bought (even some Snapdragon stuff!!) such as rocks & a patch of rough ground.

 Below is a couple of pictures of the finished board


Sunday, 20 April 2025

Terrain for pulp Alley’s The Hollow Scenario - Part 2


On to Part 2 of the board for the Hollow:
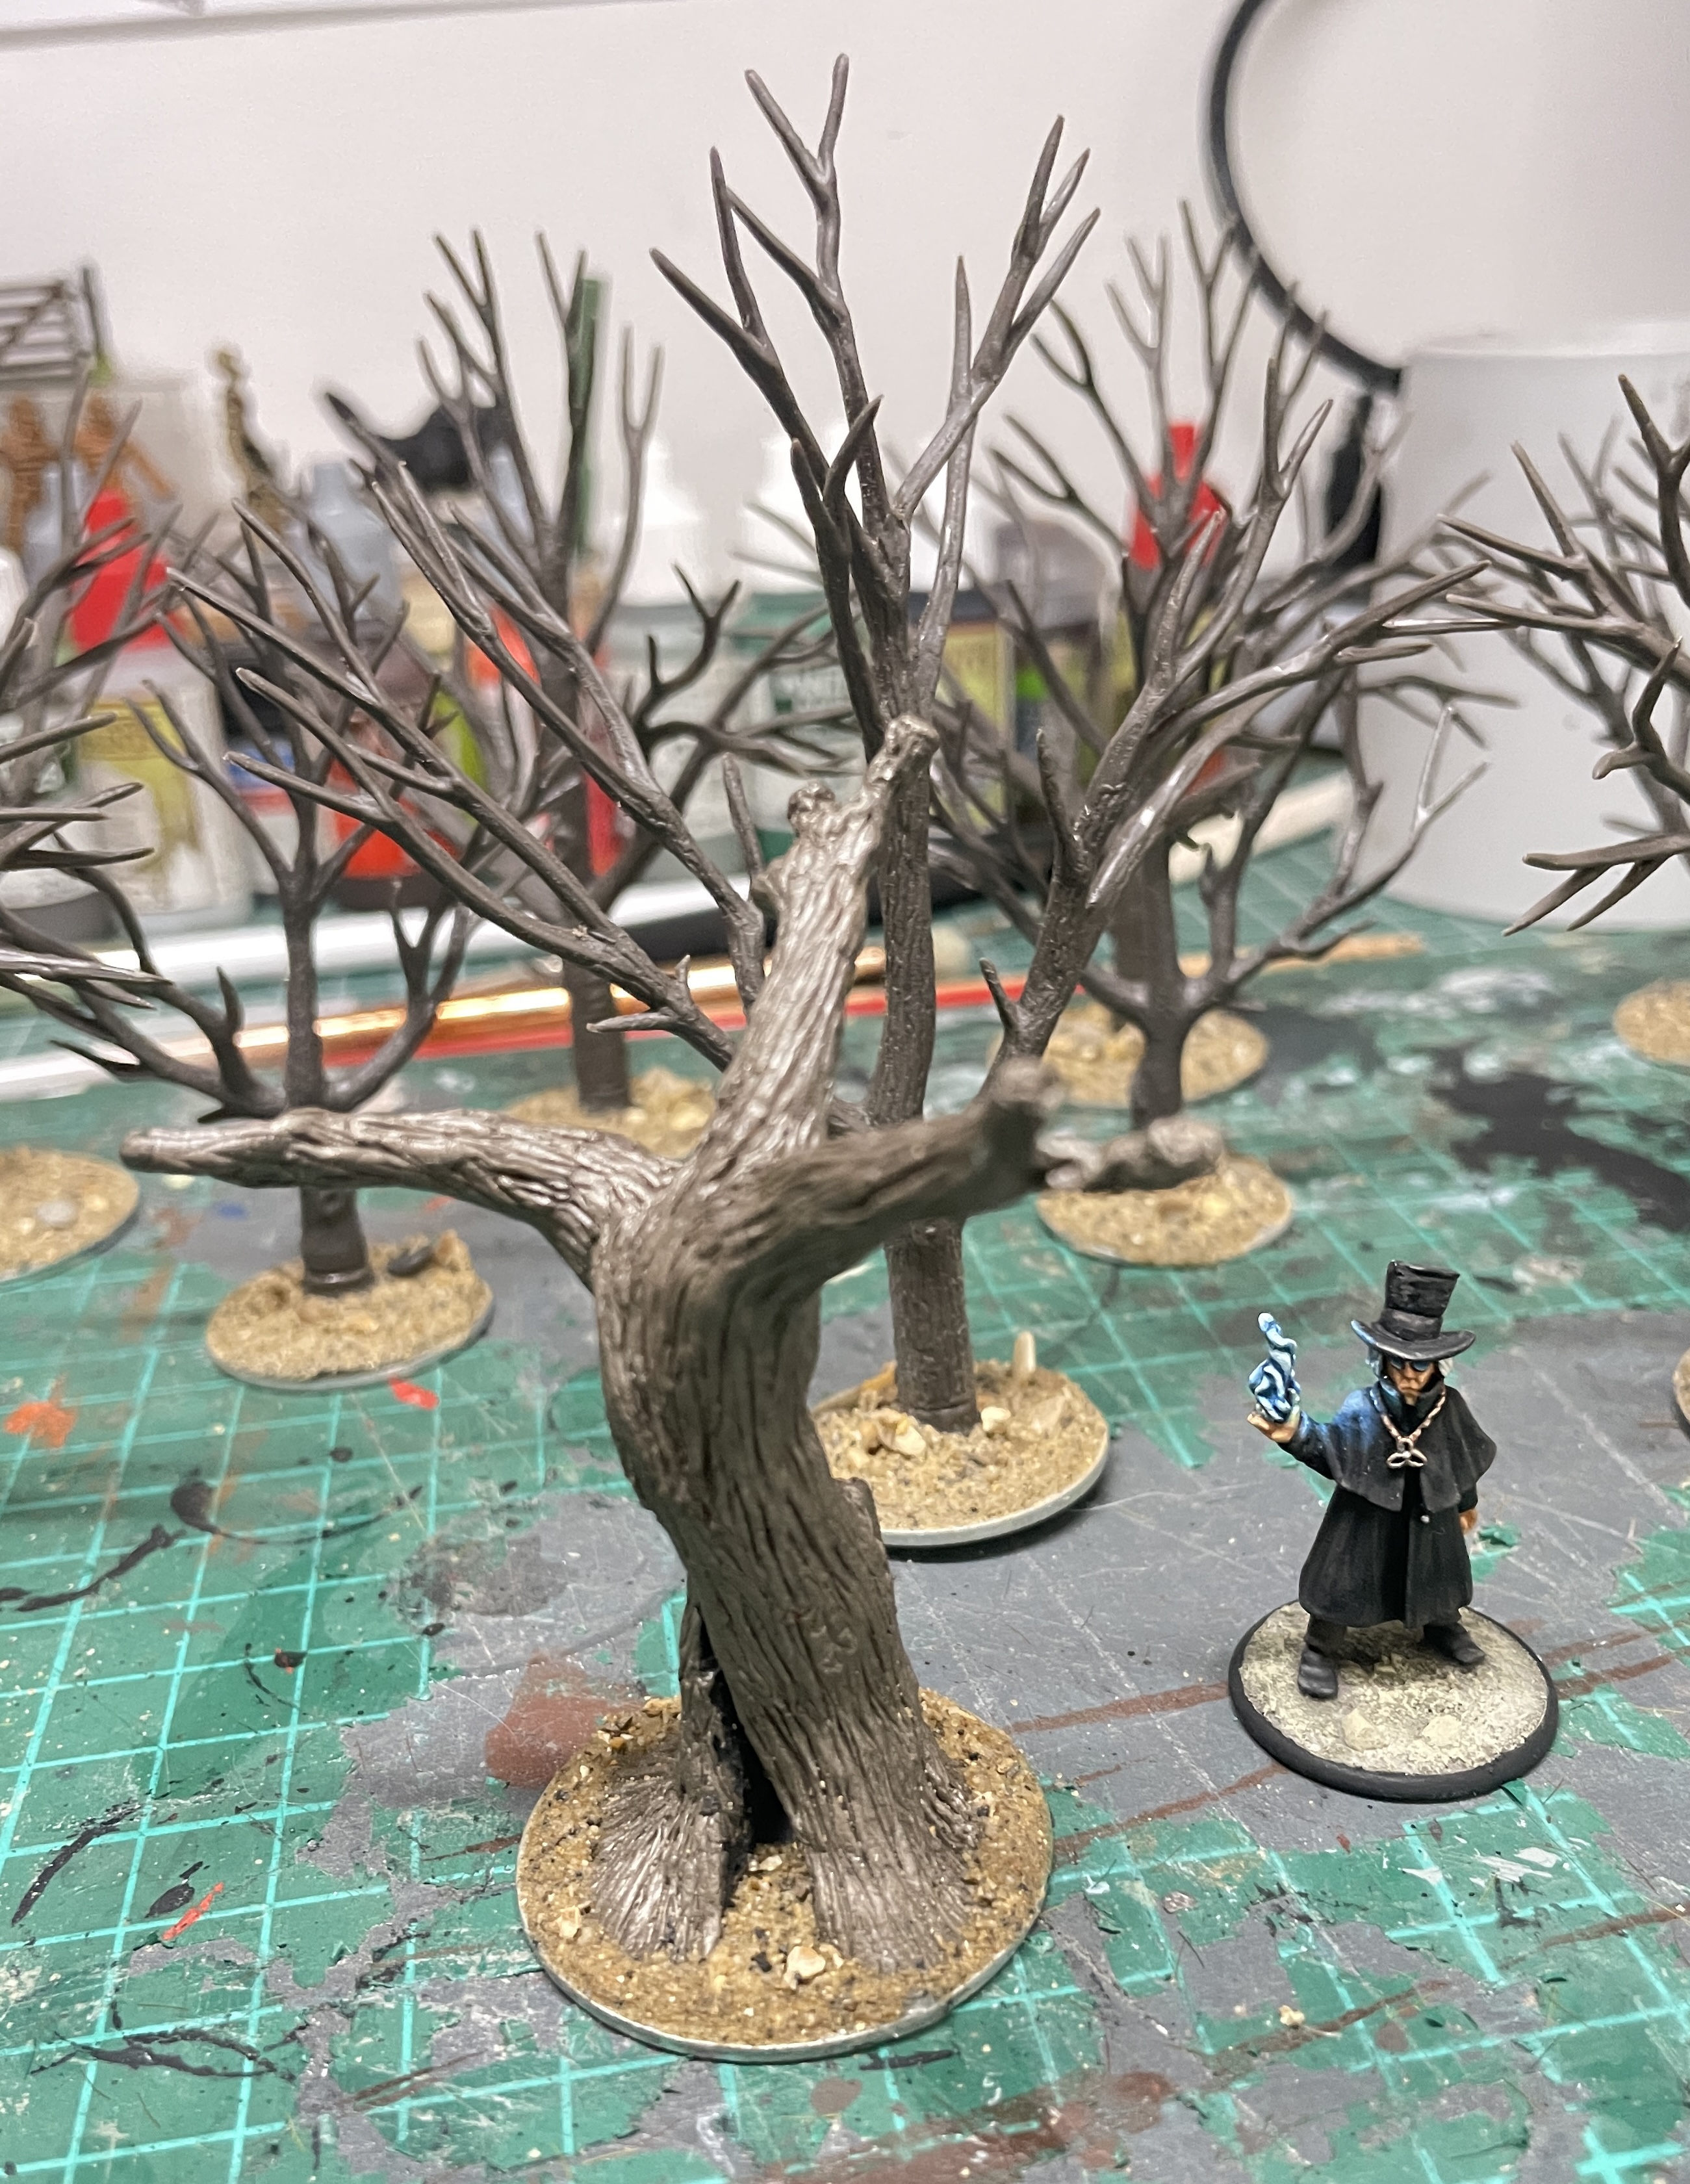
 I thought that some dead trees would be perfect to go on the board. 
After looking into making some from scratch & realising that I would like at least 15 trees to be on the table, I soon discounted that idea !
 Next I had a look at what was  commercially available & the ones that I thought were the best value were the Woodland Scenics tree armatures, the pack I found had around 25 trees in it for £21, so at about 84p each isn’t too shabby. 

They are plastic with a wire armature inside & come flat, so that they can be bent into shape. There’s quite a lot of mold lines & casting points on them & they are a right pain to clean up, but when they are cleaned & twisted into shape they look pretty good. They were then glued to washers & sand added.

To paint the trees I sprayed them with Halfords Matt black primer & slapped some black Brown over the undercoat.

I added a touch of light green & field grey to the basecoat for the 1st highlight adding various light greys for successive highlights. I probably could have spent longer faffing about cleaning them up & filling gaps, but I really couldn't be bothered! 

For the plot points in this scenario there’s a Rock with a name on it, a Tree with some initials on, a Random Bloke, a Granny & a Grave Stone. 

To make the rock I used some blue foam & cut it to shape  


I glued it to a washer added sand to the base, undercoated it & painted it in various shades of grey


I needed a tree next, but not one of the ones that I had used for the Dead Woods, this needed to be more imposing, so I decided to try to make one, I had done tree stumps before & used similar techniques.
For this I twisted some wire to make a basic tree shaped armature & the covered it with some superglue that had gone all thick & gloopy, that bulked out the armature & smoothed all the twists. 
Next I covered it in a layer of Milliput to get the basic shape & finally covered it in brown stuff & scored on the bark design. 


When I made the tree, I tried to make it look like it was alive. 
The tree was painted in similar colours to the other trees. I decided to add a rat to the base of the tree as well. 


That will do for this post, so I will finish this all off in the next post.

Sunday, 13 April 2025

Terrain for pulp Alley’s The Hollow Scenario - Part 1


With the upcoming Third Pulp Alley Games day & the theme being Gothic Horror, I decided to put on The Hollow Scenario. 

This is another one of those scenarios that I’ve always wanted to have a go at & never got round to sorting out. 

It’s a theme is hunting for the Headless Horseman’s head, with the board being in darkness apart from under a circle of street lamps, but there is only a 6” diameter circle of light under each one. 

The first thing that was needed was the street lamps, (this had been the main reason that I hadn’t played this scenario before) I managed to find some on Amazon for around £5 delivered from China, the only problem was that when they arrived 4 out of the 10 were broken.


I was offered a partial refund which I accepted as these were an easy fix & I had no intention of trying to get them to light up.
So I pulled out all the cables & glued a length of wire through the hole where the wires had been & glued each piece together.

To paint them i just gave them a quick dry brush with Black Brown & added some rust spots


I finished them of by glueing the Lamp Posts to clear 25mm bases to keep them from falling over. 

The represent the sphere of light I found some 6" clear discs for £5 (on amazon again), I would have liked Yellow ones but they would be about 5 times the price!! these didn't have a hole in the centre, so I drilled out a hole so that I could drop the Lamp Posts in.

Next up I had purchased The Renedra Ramshackle Church, when I had originally purchased it I was disappointed that it didn't have any interior detailing & the rear door was a bit short.


To overcome this I scored the inside of the walls to look like planks & added some internal window frames, I also decided to put some broken beams under the bell tower to give it a bit of support as I was going to leave the roof separate.


I had removed the rear door & the sill & stuck the whole building to a sheet of plastic that had been scored again to look like planks to raise the building up a bit. the sill was glued back onto the plastic sheet & the door glued onto the floor. I added sand & a few Card roof tiles around the edge of the building.


 I Painted the whole like old wood (hopefully that's what it looks like!) all the paints were Vallejo & I basecoated with Concrete, Old Wood for the 1st highlight & Light Mud for the 2nd one & I used a bit of Decktan in places & washed it with the ubiquitous Military Shader from Army Painter.
The roof is painted with the Quagmire Triad from Foundry.


Tuesday, 4 March 2025

The Final Flight


Well I finished the Dessert planet terrain & used it at the 2nd UK Pulp Alley games day at Geek Retreat in Harrogate, arranged by Chris From Sally 4th.

I set the board up for the final flight Scenario from The Perilous Island Campaign. 

I decided that the players heading for the  Major plot point (the large Saucer) needed a better marker to aim for for (if that makes any sense!) so I painted up a Black Cat Bases Alien Grey to use as the Pilot & plot point marker.


I had three great games during the day using the 3rd Doctor & Jo Grant. 

We were using the Sci-Fi rules from the Pulp Genres optional rules

 I completely forgot to take photos, so have pinched a few from Sally 4th & Geek Retreat Harrogates facebook page


Here's a link to the Sally 4th Hobby Blog write up of the day


Saturday, 8 February 2025

Woop Woop sound of the Police

 I got some of the Heresy Miniatures Sci-Fi Police for Christmas. 

So I’ve painted them up to guard some of the entrances in the town


They are fantastic figures, but quite slender to mast figures. 


Thursday, 30 January 2025

The Mechanics Robot

Quite a while ago, I picked up a Robot from Killer B Games’ Star Patrol range.

So I thought that I would paint it to go in the Junkyard as the Mechanics faithful retainer. 

It’s a nice chunky retro looking robot.


So here’s a picture of it next to the plastic Stargrave Alien Mechanic that I’ve painted previously 


Sunday, 26 January 2025

Sci-Fi Civilians

 I’ve done a couple more Civilian’s for the desert town. 


I took a photo with the previous civilian that I chucked some paint at. 

There’s a female figure from Khurasan miniatures, I think she’s a 70’s tv reporter. 

I had one previously & added some greenstuff to extend the skirt & make her look like she was wearing a jacket.

With this one I just painted her as is & will use her as a plot point. 

Next up is a plastic figure from Northstar, from the Stargrave range, I wanted him to have a scanner, but only had a 40k one, but it doesn’t look too bad.  

Sunday, 19 January 2025

Yet more Sci-F stuff

 I’ve made another simple tank, this time from 2 ‘Mushroom's’ an aerosol lid & plastic strip, I found a few Lego bits to make the thing on the side (didn’t take any WIP pictures though)


I also painted up a figure that I’ve had for years, I think she was a commissioned by someone over on LAF & sold over there. She can be used as a plot point to be rescued, or possibly a companion for the Doctor (should have made her a blonde, could’ve used her as Rose)


Sunday, 5 January 2025

Sci-Fi Storage Tanks

 I’ve just made a couple of storage tanks for the desert board.


These have been cobbled together from various bits that we had lying around.
These black one's main body is from a Bullet Bill sweet container, 
with the holes filled in & various bits of Plasticard & plastic rod glued on

The other one is from a weird dome bit that I found, part of an old light fitting, with the usual bits of plastic rod etc stuck on